
That collection of terracotta pots you’ve had for years? The ceramic planters that feel a bit dated? We’ve all got them. Over time, even beloved outdoor containers can start to look tired, diminishing the curb appeal of your patio or garden.
Instead of investing in an entirely new set or contemplating a big outdoor remodel, consider refreshing what you already own. With a few thoughtful touches and practical techniques, you can completely revitalize your existing flower pot crafts.
It’s about seeing potential in the familiar and adding layers of texture, color, and personality.
You don’t need a massive overhaul to make a big impact. These 18 fresh ideas focus on easy upgrades that will make your outdoor spaces feel vibrant and current again.
The Power of Paint and Texture
Paint isn’t just for walls; it’s a powerful tool for giving your pots a new lease on life. Think beyond a single coat of solid color. The right finish and application can completely change a pot’s character.
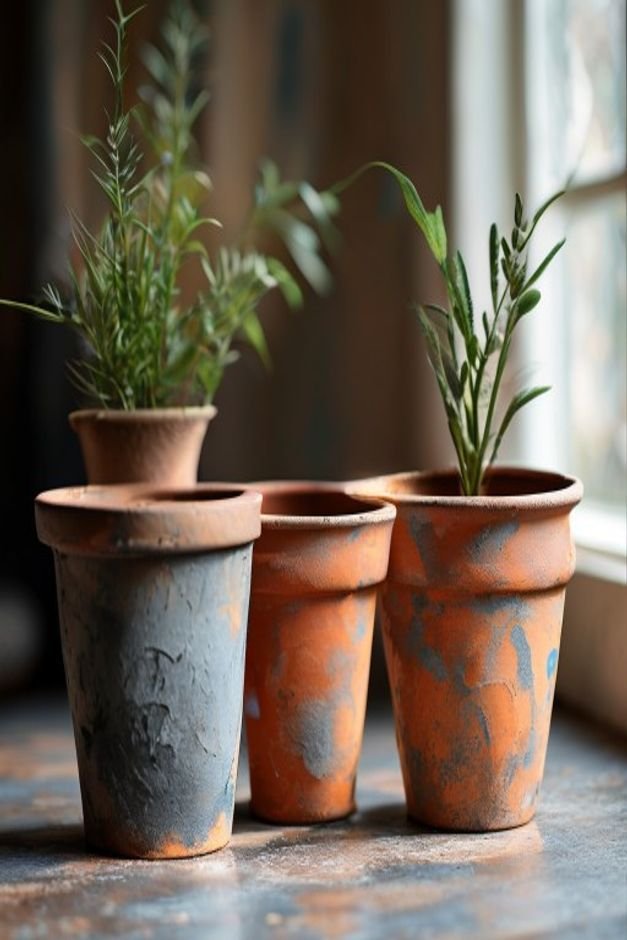
- 1. Matte Monochrome Finishes: Give plain terracotta or glazed pots a sophisticated update with a matte spray paint in a deep charcoal, forest green, or creamy off-white. This creates a clean, modern backdrop for your plants.
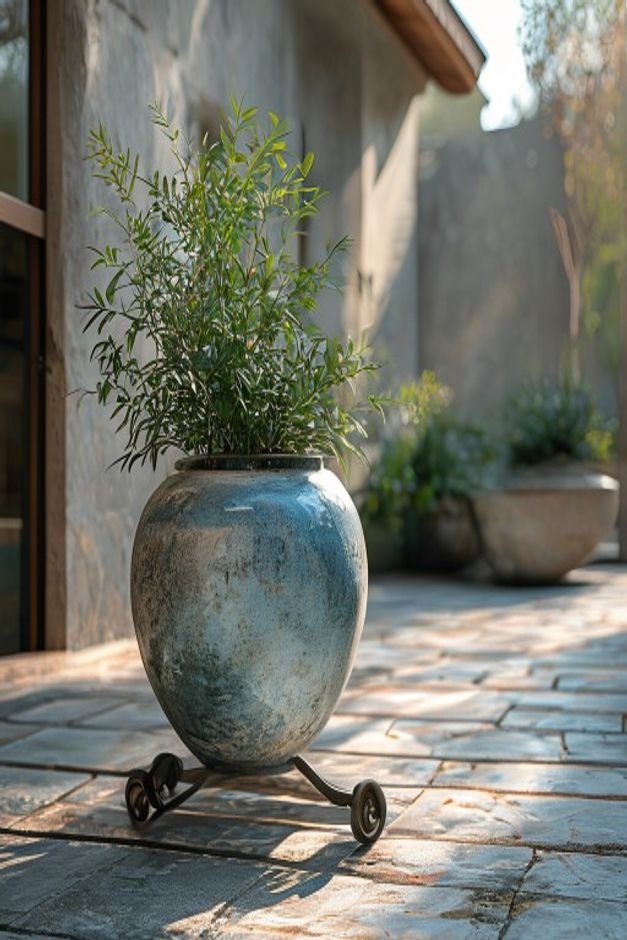
- 2. Textured Stone Effects: Specialty paints can mimic the look and feel of stone, concrete, or even aged metal. These paints add a tactile dimension, making a lightweight plastic pot feel substantial and earthy.
- 3. Layered Distressed Looks: Apply a base coat of one color, then a contrasting top coat. Lightly sand areas after drying to reveal glimpses of the undercoat, creating an attractive, weathered appearance that adds character.
- 4. Geometric Stenciled Patterns: Use painter’s tape or stencils to add simple geometric designs. Stripes, chevrons, or even a subtle grid can turn a plain pot into a focal point. Stick to two complementary colors for a refined look.
- 5. Ombre Blends: Achieve a gentle color gradient by blending two or three shades of paint. Start with the darkest at the bottom and gradually lighten towards the rim, creating a soft, artistic effect that draws the eye upward.
Wrapping and Layering with Natural Materials
Adding natural elements brings warmth and organic texture to your containers. These materials can be easily applied and offer a charming, handcrafted feel.
- 6. Jute or Rope Wrapping: Cover plain pots by hot-gluing natural jute twine or thicker rope in concentric circles from bottom to top. This creates a rustic, coastal, or farmhouse aesthetic instantly.
- 7. Mosaic Tiling with Broken Ceramics: Gather broken ceramic pieces, glass gems, or even small, colorful stones. Adhere them to your pots with outdoor-grade adhesive and grout the spaces for a beautiful, one-of-a-kind mosaic finish.
- 8. Driftwood or Pebble Accents: Glue small, flat pebbles or pieces of weathered driftwood onto the surface of a pot. Arrange them in a pattern or randomly for an organic, naturalistic texture that speaks to the outdoors.
- 9. Fabric Decoupage: Use outdoor-friendly fabric glue to adhere pretty fabric scraps or patterned napkins to your pots. Seal with a waterproof topcoat for durability. Botanical prints or subtle patterns work wonderfully.
Adding Architectural Details
Sometimes, it’s the small, unexpected additions that make the biggest difference. Think of these as jewelry for your garden containers.
- 10. Decorative Handles or Knobs: Attach antique-style drawer pulls or small metal handles to the sides of larger pots. This adds a touch of architectural elegance and can make a simple pot look like a custom piece.
- 11. Metal Banding or Studs: Wrap thin strips of copper or brass around the rim or base of a pot, securing with adhesive. For a more industrial look, add decorative metal studs or tacks in a pattern.
- 12. Wire Cages or Trellises: For climbing plants, attach a small, decorative wire cage or mini trellis to the pot itself. This provides support and adds an interesting visual layer, making the plant part of the pot’s design.
Thoughtful Plant Pairings for Your Flower Pot Crafts
How you arrange and choose your plants profoundly affects the overall look of your flower pot crafts. It’s about creating a harmonious mini-landscape.
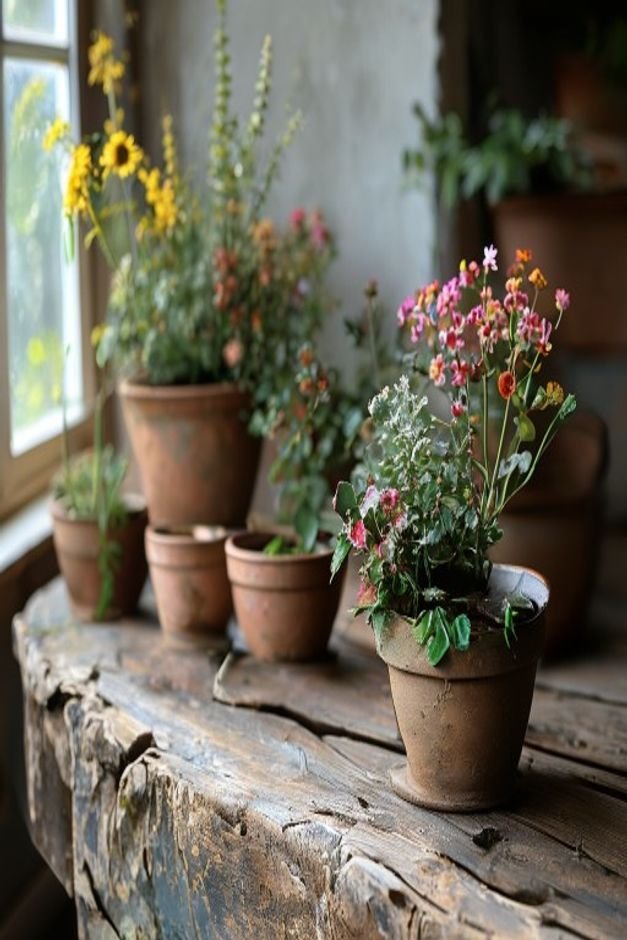
- 13. Varied Heights and Scales in Groupings: Arrange pots of different sizes and heights together to create visual interest. Pair a tall, slender pot with a dramatic plant next to a wider, lower pot spilling with trailing foliage.
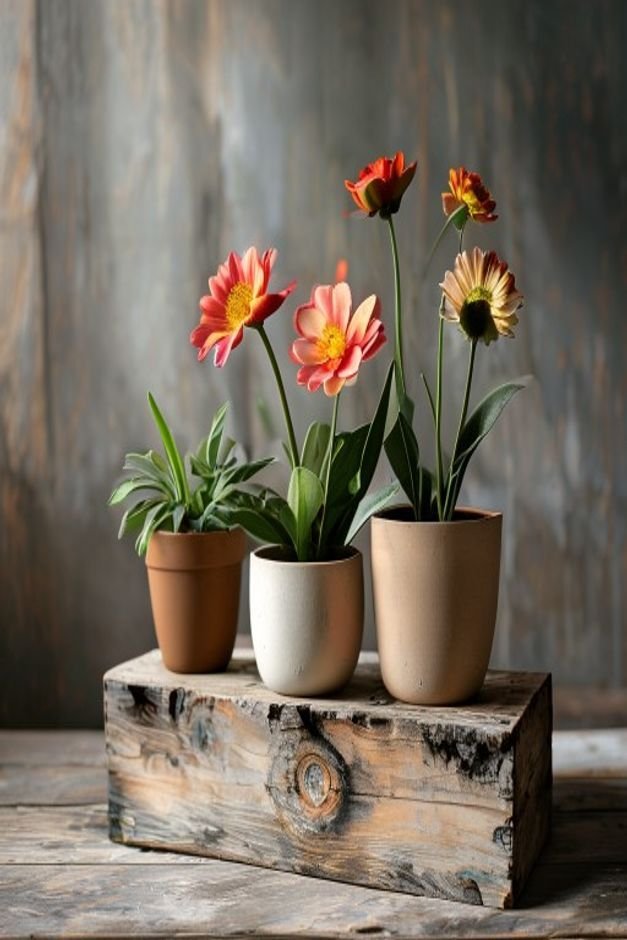
- 14. Complementary Plant and Pot Colors: Choose plants whose foliage or flowers either contrast boldly or harmonize subtly with your pot colors. A vibrant fuchsia petunia in a matte gray pot pops, while soft lavender in a pale green pot offers serenity.
- 15. Succulent Gardens in Shallow Pots: Create miniature desert landscapes. Arrange various succulents and cacti in a wide, shallow pot for a low-maintenance, sculptural display. Add decorative gravel or small stones for texture.
- 16. Vertical Displays with Hanging Pots: Utilize vertical space. Hang smaller, updated pots from a wall-mounted rack or a sturdy trellis. This adds dimension and frees up floor space on a small patio.
Illuminating Your Container Displays
Don’t let your beautiful pots disappear when the sun sets. Strategic lighting can highlight their textures and colors, extending their enjoyment into the evening.
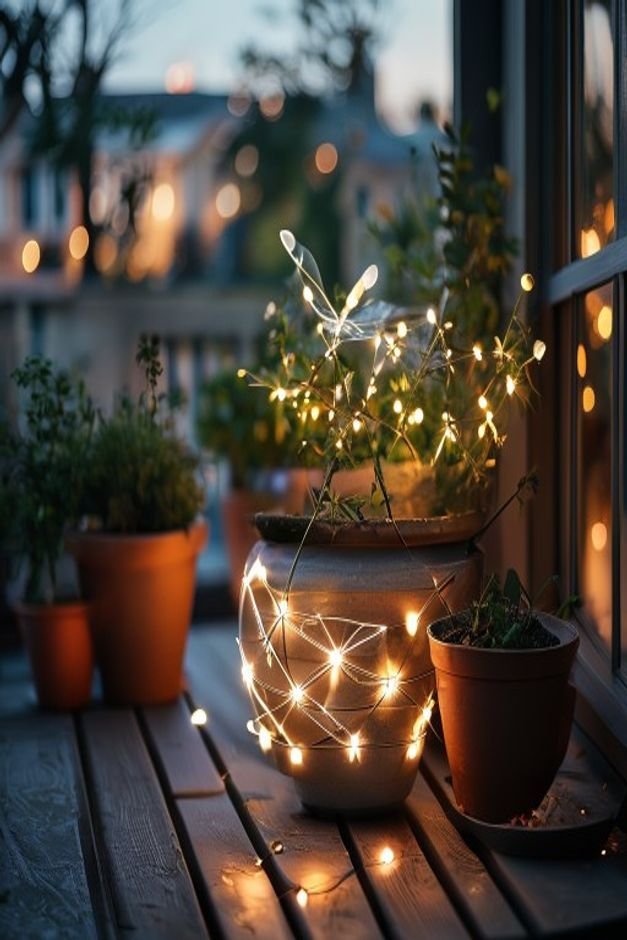
- 17. Solar-Powered Fairy Lights: Wrap delicate solar-powered fairy lights around the base or rim of your pots. They cast a magical, soft glow that highlights the pot’s form and the plant’s silhouette.
- 18. Small Integrated LED Spotlights: Place tiny, discreet LED spotlights on the ground around your key pots, or even clip them to the rim. Direct the light upwards to illuminate the plant and its container, creating dramatic shadows and highlights.
A Fresh Outlook on Your Outdoor Spaces
Updating your flower pot crafts doesn’t require a complete garden overhaul. It’s about seeing your existing pieces with fresh eyes and applying a bit of creativity.
Each of these ideas offers a practical way to infuse new life into your outdoor containers, making your patios and garden corners feel polished and inviting.
From a fresh coat of paint to thoughtful plant pairings and clever embellishments, these small changes add up to significant visual impact. You’ll not only enhance your home’s curb appeal but also enjoy the satisfaction of crafting something beautiful with your own hands.
Embrace these simple upgrades and watch your outdoor spaces bloom anew.